Introduction
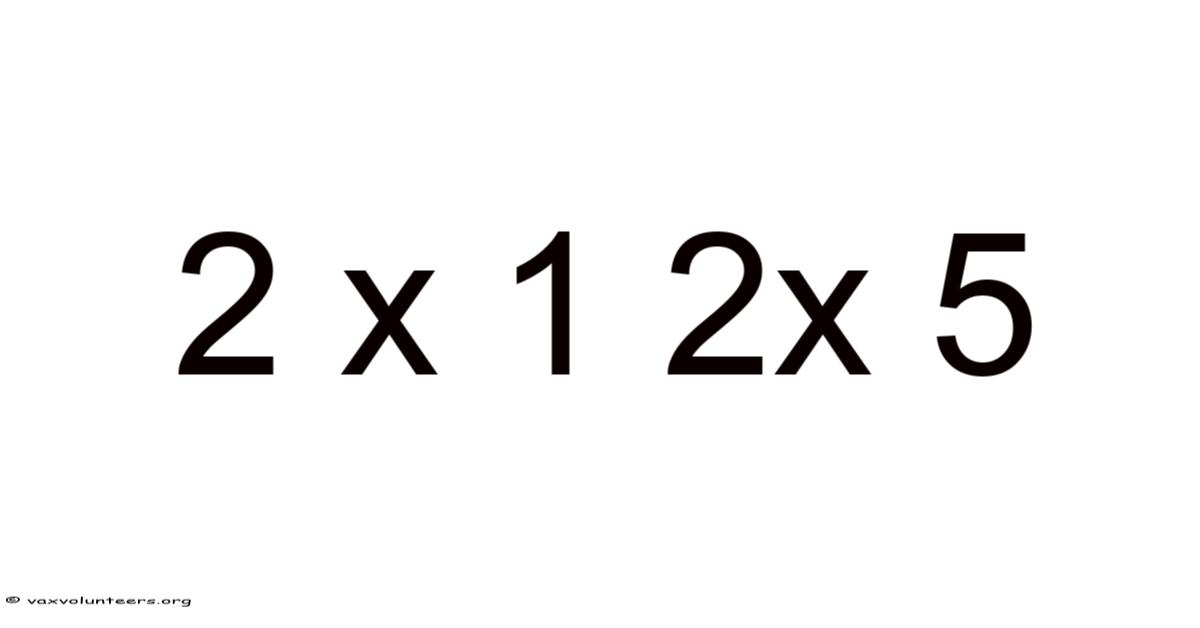
When you walk into a lumber yard or browse a home‑improvement catalog, you’ll see boards labeled with numbers like 2 × 1, 2 × 4, 2 × 6, and so on. At first glance the notation looks like a simple multiplication problem, but in the world of wood products it carries a very specific meaning: it tells you the nominal thickness and width of a piece of lumber before it is planed and dried. That's why the phrase “2 × 1 2 × 5” is often encountered when contractors compare two common sizes—2 × 1 (sometimes called a “two‑by‑one”) and 2 × 5 (a “two‑by‑five”). Understanding what these numbers really represent, how they differ from the actual dimensions you measure with a tape, and why the distinction matters for structural integrity, cost, and project planning is essential for anyone working with wood, whether you’re a DIY enthusiast framing a shed or a professional builder erecting a commercial wall.
In this article we will unpack the meaning behind the 2 × 1 and 2 × 5 designations, walk through the step‑by‑step logic of nominal versus actual sizing, provide real‑world examples of where each size shines, explore the scientific principles that govern their strength and stiffness, highlight common pitfalls that lead to costly mistakes, and answer frequently asked questions. By the end, you’ll be able to read a lumber tag with confidence, select the right board for the job, and explain why a 2 × 1 is not literally two inches by one inch Not complicated — just consistent..
Detailed Explanation
What Does “2 × 1” and “2 × 5” Mean?
In North American lumber grading, the numbers separated by a multiplication sign (×) refer to the nominal dimensions of a board: the first number is the thickness and the second is the width, both measured in inches before the wood is surfaced (planed) and dried. The term “nominal” is crucial because the final, dried, and planed board is always slightly smaller than the nominal size due to material removal during milling and shrinkage as moisture content drops.
- 2 × 1 (nominal) → intended to be roughly 2 inches thick and 1 inch wide.
- 2 × 5 (nominal) → intended to be roughly 2 inches thick and 5 inches wide.
After surfacing and drying to a standard moisture content (usually 19 % for “green” lumber or 12–15 % for kiln‑dried), the actual dimensions become:
| Nominal Size | Actual Thickness | Actual Width |
|---|---|---|
| 2 × 1 | 1.Day to day, 75 in (19 mm) | |
| 2 × 5 | 1. 5 in (38 mm) | 0.5 in (38 mm) |
No fluff here — just what actually works.
Thus, a 2 × 1 is actually a 1.Now, 5 × 0. 75 board, and a 2 × 5 is a 1.Here's the thing — 5 × 4. 5 board. The thickness stays consistent across all “2‑by” lumber (always 1.5 in after planing), while the width scales with the second number.
Why does the industry use nominal sizes? In real terms, historically, lumber was cut rough‑sawn to the nominal dimensions, then planed to a smooth finish. The nominal label persisted as a convenient shorthand for designers, builders, and code officials, even though the actual cross‑section changed. Worth adding: modern building codes (e. g., the International Residential Code) reference nominal sizes when specifying spans, loads, and fastener requirements, but the underlying engineering calculations always use the actual dimensions.
Why the Confusion Persists
Many newcomers assume that “2 × 1” means a board that is exactly 2 inches by 1 inch, leading to errors when they cut material to fit a gap or calculate load capacity. The discrepancy becomes especially important in applications where precise fit matters—such as cabinetry, flooring, or metal‑to‑wood connections—where a 0.25‑inch difference can cause gaps, misaligned fasteners, or compromised shear resistance Easy to understand, harder to ignore..
Step‑by‑Step or Concept Breakdown
Step 1: Identify the Nominal Label
Look at the stamp or tag on the board. It will read something like “2 × 4 #2 SPF” or “2 × 1 Stud”. The first two numbers are the nominal thickness and width Most people skip this — try not to..
Step 2: Convert Nominal to Actual Thickness
All “2‑by” lumber (2 × anything) has a standard actual thickness of 1.5 in after planing. This is a fixed value you can memorize:
- Actual thickness = Nominal thickness – 0.5 in (for 2‑by stock).
Step 3: Convert Nominal to Actual Width
The width follows a similar rule, but the subtraction varies because the amount of material removed depends on the original width. For most softwood lumber the rule
###Step 3 – Converting the Nominal Width to an Actual Width
The rule for width is not a fixed subtraction; it depends on how much material the mill removes during planing. For most soft‑wood studs the pattern is:
| Nominal Width | Typical Actual Width |
|---|---|
| 1 in | 0.So 75 in |
| 2 in | 1. In real terms, 5 in |
| 3 in | 2. 5 in |
| 4 in | 3.In practice, 5 in |
| 5 in | 4. 5 in |
| 6 in | 5.5 in |
| 7 in | 6.5 in |
| 8 in | 7.On top of that, 5 in |
| 9 in | 8. 5 in |
| 10 in | 9.5 in |
| 12 in | 11. |
The pattern is essentially “nominal width – 0.And 5 in + 0. Also, 5 – 0. 5 in). ” In practice the mill removes about ¼ in from every edge of the board, so a 5‑inch‑nominal board ends up at 4.5 = 4 in, then a small extra trim brings it to 4.5 in for widths up to 6 in, then – 0.5 in (5 – 0.0 in for larger sizes.When the board is wider, the same amount of material removed from both faces results in a slightly larger absolute difference, which is why the actual width increments by 1 in for each additional nominal inch beyond 4 in.
Key takeaway: The actual width is always nominal width – 0.0 in (i.Because of that, 5 in + 0. 5 in** for sizes up to 4 in, and **nominal width – 0.Also, e. , essentially the same subtraction) for larger dimensions. The result is a board that is ½ in narrower than its nominal label, give or take a few thousandths of an inch depending on the species and the mill’s tolerances Surprisingly effective..
Step 4 – Adjusting for Species and Moisture
-
Species‑specific shrinkage:
- Pine, spruce, fir (SPF) typically shrink about 2 % in width and thickness when they go from green to 19 % MC.
- Hardwoods (e.g., oak, maple) can shrink 3–5 % because they have a higher initial moisture content and a denser cell structure.
-
Kiln‑drying vs. air‑drying:
- Kiln‑dried lumber is usually brought to 12–15 % MC and then planed, giving the dimensions listed above.
- Air‑dried “green” lumber will be larger; once it reaches equilibrium with the service environment (often 8–12 % MC in interior construction) it will contract to the same final dimensions, but the path to get there can involve several weeks of drying.
-
Engineered products:
- I‑joists, laminated veneer lumber (LVL), and structural composite lumber (SCL) are manufactured to exact finished dimensions, so their “nominal” size is essentially the same as the actual size. When a project calls for a “2 × 6” I‑joist, you can treat it as a true 1.5 × 5.5 member without any conversion.
Step 5 – Why Builders Still Talk in Nominal Terms - Historical shorthand: Early sawmills produced boards that were roughly the size stamped on them; the label stuck as a convenient way to order “2‑by‑4s” without constantly specifying fractions.
- Code language: Building codes (IRC, IBC) reference nominal dimensions when prescribing spans, bearing pressures, and fastener schedules. This simplifies the language for engineers, inspectors, and manufacturers.
- Supply chain consistency: Lumber yards stock by nominal size because that’s what customers expect. Switching to a “real‑size” catalog would require a wholesale re‑education of the market.
Bottom line: The industry’s reliance on nominal sizing is a legacy of practicality, not a flaw. When precision matters—such as in cabinetry, millwork, or engineered connections—always verify the actual dimensions before cutting or fastening.
Practical Examples
| Application | Nominal Size Used | Actual Size Used in Design |
|---|---|---|
| Standard stud wall | 2 × 4 | 1.5 × 3.Day to day, 5 in |
| Floor joist spacing (16 in oc) | 2 × 8 | 1. But 5 × 7. 25 in |
| Deck railing post | 4 × 4 | 3. |
Step 6 – Measuring the Real‑World Size
Even though the nominal system works well for bulk ordering, the only reliable way to guarantee fit is to measure the actual dimensions of each piece before it is installed No workaround needed..
| Tool | Typical Accuracy | When to Use |
|---|---|---|
| Digital caliper | ±0.025 mm) | Precision joinery, cabinetry, metal‑to‑wood connections |
| Tape measure (steel) | ±0.Practically speaking, 05 in (±1. Which means 001 in (±0. 3 mm) | Rough framing, layout of studs, joists, and decking |
| Laser distance meter | ±0. |
Best practice:
- Check at the mill – If the lumber arrives in a sealed bundle, verify the width and thickness of a few randomly selected boards before they are stacked.
- Re‑measure after acclimation – Allow the material to sit in the jobsite environment for at least 48 hours (or longer in humid climates). Moisture content can shift dimensions by a few thousandths of an inch as the wood equilibrates.
- Document tolerances – Record any deviation from the expected 1.5 × 3.5 in for a “2 × 4” on a job‑site log. This data helps the crew anticipate cumulative errors in multi‑bay walls or long spans.
Step 7 – Design Adjustments When Actual Dimensions Vary
When the measured size deviates from the nominal‑to‑actual conversion, designers must make minor adjustments to keep structural integrity and aesthetic consistency Nothing fancy..
-
Stud Wall Framing – A 2 × 4 that measures 1.502 × 3.495 in instead of the nominal 1.5 × 3.5 in will reduce the cavity width by 0.005 in. In a typical 2‑by‑4 wall with 16 in on‑center spacing, the cumulative effect on insulation R‑value is negligible, but the installer may need to shim the studs or use adjustable brackets for electrical boxes Nothing fancy..
-
Joist Span Calculations – For a 2 × 8 that actually measures 1.500 × 7.250 in, the moment of inertia (I) is slightly lower than the tabulated value. Engineers can compensate by increasing the spacing by one inch or selecting a deeper joist (e.g., 2 × 10) for the same span. Software packages that accept “actual dimensions” will automatically recalculate the allowable load Easy to understand, harder to ignore. But it adds up..
-
Fastener Scheduling – The International Residential Code (IRC) specifies nail lengths based on nominal depths (e.g., 16‑d common nails for a 2 × 4). If the actual thickness is 1.502 in, a 16‑d nail still penetrates sufficiently, but a 15‑d nail may be more appropriate for a 2 × 6 that measures 1.500 × 5.500 in to avoid over‑driving and splitting Still holds up..
Step 8 – Real‑World Case Study
Project: Renovating a 1970s ranch‑style home, replacing interior load‑bearing walls.
Challenge: The existing studs were “2 × 4” but had been air‑dried for decades, resulting in a final moisture content of 14 % and dimensions of 1.504 × 3.498 in.
Solution:
- The contractor measured a sample set of studs with a digital caliper and logged the average width as 1.503 in and thickness as 3.497 in.
- Because the wall was being rebuilt to meet current energy codes, the team decided to add continuous exterior rigid foam to reduce thermal bridging. The foam panels were ordered to fit the actual stud spacing of 16 in + 0.003 in, ensuring a tight seal without gaps.
- Fasteners were swapped from 16‑d common nails (2 in) to 15‑d 2 in nails, providing a 0.5‑in longer embedment into the sheathing while still meeting the IRC nailing schedule.
Outcome: The renovated walls passed the final inspection with a “tight‑fit” rating for insulation, and the homeowner reported no audible squeaks or gaps after the first heating season It's one of those things that adds up..
Step 9 – Summary of Key Takeaways
| Aspect | Nominal vs. Actual | Practical Implication |
|---|---|---|
| Ordering |
Summary of Key Takeaways (continued)
| Aspect | Nominal vs. 5 in with the same load. 1 R per wall. But | | Fasteners | Nail length based on nominal depth | Verify embedment depth with a tape measure; adjust nail length by one size if the wood is 0. | | Framing spacing | 16‑in on‑center nominal | Add a 0.495 in | Order 2 × 4s with a tolerance of ±0.Actual | Practical Implication | |--------|-------------------|-----------------------| | Ordering lumber | 2 × 4 “nominal” may be 1.5‑in span if the actual width is 1.Consider this: 505 in; otherwise, an 8‑in joist can span 16. Because of that, | | Insulation R‑value | Slight reduction in cavity width | Use high‑R foam or thicker fiberglass; the difference is <0. 002 in thicker. 005‑in “shim” or use a 16.010 in; use a “mass‑produced” label if available. Here's the thing — 502 × 3. | | Code compliance | IRC and local codes use nominal sizes | Verify that the actual dimensions still meet the “maximum” values in the code; if not, substitute a deeper member or change spacing.
No fluff here — just what actually works.
Conclusion
In modern construction, the distinction between nominal and actual lumber dimensions is more than a technical footnote—it is a practical reality that affects every phase of a building project. While the industry’s long‑standing convention of labeling a 2 × 4 as “2 × 4” simplifies ordering and communication, the true dimensions of a board can vary by several thousandths of an inch due to moisture loss, kiln drying, and manufacturing tolerances Worth keeping that in mind..
This changes depending on context. Keep that in mind.
These seemingly minute differences can influence:
- Structural calculations – Slightly lower moments of inertia or load‑bearing capacity.
- Insulation performance – Minor gaps that affect R‑values and air leakage.
- Fastener selection – Over‑driving or under‑driving nails, leading to splitting or insufficient embedment.
- Code compliance – Ensuring that the actual dimensions still satisfy IRC, ASTM, and local ordinances.
By incorporating a few disciplined practices—such as measuring a representative sample of lumber, documenting actual dimensions in the construction schedule, and using adjustable framing hardware—professionals can mitigate the risk of misalignment and confirm that the final structure meets both performance and safety expectations.
When all is said and done, the shift from nominal to actual awareness is not a costly overhaul but a refinement of the craft. With accurate measurements, thoughtful design adjustments, and a commitment to continuous documentation, builders can deliver projects that are structurally sound, energy efficient, and compliant with the evolving standards of the profession.
It sounds simple, but the gap is usually here Simple, but easy to overlook..